DIY Luxury Deep Nourishing Gel Hand Sanitizer: Your Ultimate Guide
1. Introduction: Why Make Your Own Hand Sanitizer?
In a world where cleanliness and hygiene have become top priorities, hand sanitizers are ubiquitous. You see them in stores, offices, schools, and almost everywhere you turn. However, many commercial hand sanitizers contain ingredients that can dry out your skin, leaving it feeling irritated and cracked. If you’ve ever noticed your hands feeling like sandpaper after consistent use of alcohol-based sanitizers, you’re not alone.
Creating your own DIY Luxury Deep Nourishing Gel Hand Sanitizer allows you to take control of the quality and the effects that each ingredient has on your skin. You get to choose premium natural components that are not only antibacterial but also deeply moisturizing. Moreover, you can tailor the scent to your personal preference by selecting essential oils that align with your taste—whether you love floral notes, soothing chamomile, or earthy undertones of sandalwood.
This blog post is designed to guide you step-by-step through the entire process, ensuring you achieve professional results in the comfort of your own home. You’ll learn about key ingredients, recommended tools, and the importance of adhering to safety guidelines. By the time you finish reading, you’ll have all the knowledge you need to make a luxurious, nourishing, and effective hand sanitizer that rivals or even surpasses anything you can buy off the shelf.
2. Key Ingredients and Their Benefits
1. 99% Isopropyl Alcohol
This is the antibacterial star of the show. To ensure your sanitizer effectively reduces germs, you need a high concentration—99% isopropyl alcohol is ideal. Lower concentrations can compromise effectiveness, so it’s crucial not to substitute with weaker solutions.
2. Organic Aloe Vera Gel
Aloe vera offers soothing, hydrating properties. It helps calm irritated skin and provides a gentle consistency. Make sure to use a pure, uncolored gel without additional additives.
3. Carbomer 940
Carbomer 940 is the thickening agent that turns a watery mixture into a silky, luxurious gel. When properly combined with triethanolamine (TEA), it sets the perfect texture that spreads easily on your hands without dripping.
4. Triethanolamine (TEA)
This ingredient neutralizes and activates the carbomer, creating a stable gel. Adding the correct amount ensures you get the ideal texture: not too thick and not too watery.
5. Vegetable Glycerin
Glycerin is a powerful humectant, drawing moisture into the skin. It plays a vital role in preventing dryness and maintaining the skin’s protective barrier.
6. Hyaluronic Acid
A popular skincare ingredient, hyaluronic acid is known for its exceptional moisturizing capabilities. It holds up to 1000 times its weight in water, making it one of the best hydrating compounds you can include.
7. Jojoba Oil
Jojoba oil is lightweight and non-comedogenic, meaning it won’t clog your pores. It closely resembles the skin’s own sebum, making it a highly compatible moisturizer for most skin types.
8. Vitamin E Oil
Vitamin E is a potent antioxidant that helps protect skin cells from oxidative damage. It also supports skin health and contributes to a soft, supple feel.
9. Panthenate (Vitamin B5)
Panthenol (or Provitamin B5) is loved in skincare for its soothing and restorative properties. It helps maintain a healthy skin barrier and speeds up recovery from minor irritations.
10. Allantoin
Allantoin is recognized for its skin-calming and moisture-retaining properties, making your sanitizer particularly gentle for sensitive or easily irritated skin.
11. Essential Oils (Lavender, German Chamomile, Helichrysum, Frankincense Serrata, Sandalwood)
The essential oil blend not only imparts a beautiful, soothing aroma but also carries additional skincare benefits. Lavender can calm the senses, chamomile is particularly soothing to sensitive skin, frankincense is reputed for its rejuvenating properties, and sandalwood brings a grounding, earthy note.
3. Equipment and Workspace Setup
To ensure your process is seamless and hygienic, gather the following equipment:
- Digital Scale: for measuring ingredients accurately in grams or ounces.
- Glass Mixing Bowl (4-cup capacity): ensures non-reactivity with essential oils and alcohol.
- Stainless Steel Whisk: durable and resistant to reactions with ingredients.
- Glass Measuring Cups (1-cup and 2-cup measures): for precise liquid measurements.
- Measuring Spoons (Tablespoon, Teaspoon, ½ Teaspoon): for smaller quantity measurements.
- Small Funnel (2-inch opening): helps avoid spillage while transferring sanitizer into bottles.
- Glass Stirring Rod: for gentle mixing, especially helpful in the initial blending phases.
- Clean Cloth Towels: for drying and wiping off any spills.
- Thermometer (optional): if you want to confirm room temperature.
Workspace Recommendations:
- Choose a clean, clutter-free area with enough space to maneuver.
- Disinfect the surface with isopropyl alcohol or a suitable cleaner.
- Lay down clean paper towels to keep your mixing bowls and tools on.
- Ensure there is adequate ventilation. An open window or small fan helps disperse fumes from the isopropyl alcohol.
- Keep pets, children, or any high-traffic distractions away from your workspace until you’re done.
4. Safety First: Handling Ingredients Responsibly
Before you begin, it’s essential to follow these safety measures:
- Wear Protective Gear: This includes nitrile gloves, splash-proof safety goggles, and a long-sleeved shirt to protect your skin from accidental splashes.
- Tie Up Long Hair: Prevent hair from coming into contact with your mixture or from falling into the product.
- No Flames or Sparks: Keep isopropyl alcohol away from open flames, stovetops, or any ignition source.
- Handle Essential Oils Carefully: Essential oils can be potent. Keep them away from your eyes, nose, and mouth. If accidental contact happens, rinse immediately.
- Accurate Measurements: Too much or too little of certain ingredients can affect the final product’s consistency, efficacy, and safety.
5. Detailed Step-by-Step Instructions
Below is an overview of each phase in the process, ensuring you create a high-quality, luxurious gel hand sanitizer. Take your time and follow each step carefully.
Phase 1: Preparation (15 minutes)
- Sanitize Your Workspace (5 minutes)
- Wipe all surfaces with a disinfectant or isopropyl alcohol.
- Clean tools with hot water, then allow them to air-dry or pat them dry with a clean towel.
- Lay out fresh paper towels on the counter to place your clean tools and bowls.
- Organize Your Ingredients (5 minutes)
- Group them by phase: Base Components, Thickening System, Nourishing Complex, and Essential Oils.
- Ensure all ingredients are at room temperature.
- Safety Setup (5 minutes)
- Put on your nitrile gloves, safety goggles, and ensure your hair is secured.
- Keep paper towels or a clean cloth handy for any spills.
Phase 2: Base Creation (10 minutes)
- Measure Alcohol (3 minutes)
- Using your glass measuring cup, pour the exact amount of 99% isopropyl alcohol.
- Keep it away from any heat sources.
- Add Aloe Vera (2 minutes)
- Carefully measure the pure aloe vera gel.
- Pour it into the mixing bowl containing the alcohol, stirring gently with a glass rod to minimize bubbles.
- Initial Mixing (5 minutes)
- Stir slowly and in one direction, helping the aloe vera gel to disperse evenly in the alcohol.
- You’re aiming for a clear or slightly translucent mixture.
Phase 3: Thickening Process (15 minutes)
- Add Carbomer (5 minutes)
- Using a sifter or simply sprinkling slowly, add the Carbomer 940 powder across the surface.
- Avoid dumping it all in one spot; clumps can be stubborn to break up.
- Initial Whisking (5 minutes)
- Begin whisking gently.
- As the carbomer starts to absorb the liquid, you’ll notice some thickening.
- Triethanolamine (TEA) Addition (5 minutes)
- Add TEA dropwise while whisking.
- The gel will become more structured and cohesive.
- Check the texture: The goal is a stable gel that is not too runny.
Phase 4: Nourishing Complex Integration (20 minutes)
- Add Glycerin (3 minutes)
- Pour glycerin slowly while stirring.
- This ensures even distribution and reduces the chance of lumps.
- Hyaluronic Acid Addition (5 minutes)
- Sprinkle in the hyaluronic acid powder.
- Whisk thoroughly to help it dissolve and hydrate.
- Hyaluronic acid may take a few minutes to fully absorb the liquid.
- Oil Phase Addition (7 minutes)
- Add jojoba oil in a thin stream, mixing as you go.
- Follow with vitamin E.
- The mixture may loosen slightly, but continue whisking until it reincorporates into a smooth gel.
- Final Additions (5 minutes)
- Stir in panthenate (B5) and allantoin.
- Whisk gently but thoroughly, ensuring there are no visible particles.
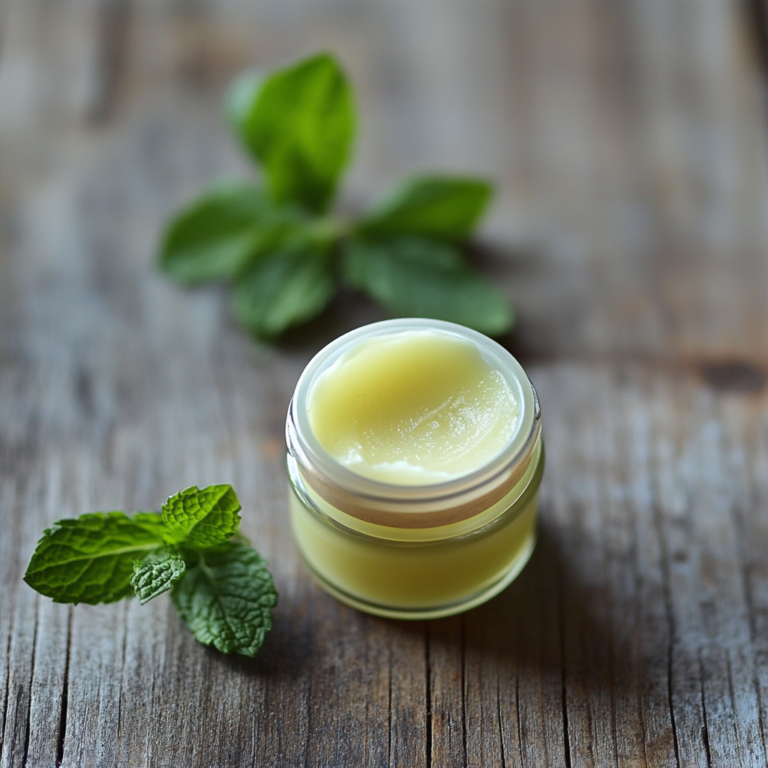
- At this stage, you’ll notice the gel becoming luxurious to the touch.
Phase 5: Essential Oil Integration (15 minutes)
- Primary Oils (5 minutes)
- Count out lavender drops. Stir briefly.
- Follow with German chamomile drops. Stir again.
- The aroma will begin to develop; lavender and chamomile offer a calming floral note.
- Secondary Oils (5 minutes)
- Add helichrysum and frankincense serrata.
- Stir gently to distribute.
- You might detect deeper, resinous notes layering into the aroma.
- Final Oil (5 minutes)
- Introduce the sandalwood drops last.
- Give the mixture one final, thorough blend.
- Let the mixture rest for a minute or two, allowing the essential oils to “marry.”
Phase 6: Quality Control (10 minutes)
- Consistency Check (3 minutes)
- The gel should feel smooth and non-sticky when you rub a small amount between your fingers.
- If it’s too thick, add a small amount of alcohol. If too thin, sprinkle a tiny bit more carbomer and whisk.
- Aroma Verification (2 minutes)
- Smell the final product. You’re looking for a balanced, pleasant aroma.
- If the fragrance is too strong, let it settle; essential oils often diffuse over time.
- Visual Inspection (5 minutes)
- Check for any lumps or particles.
- Ensure there’s no separation of oils on the surface.
Phase 7: Bottling Process (15 minutes)
- Bottle Preparation (5 minutes)
- Clean and dry your bottles (glass or PET plastic).
- Ensure caps are functioning (flip-top or pump-style, depending on preference).
- Filling Process (5 minutes)
- Use the small funnel to transfer your gel into each bottle.
- Fill to the bottle’s shoulder to prevent overflows.
- Final Steps (5 minutes)
- Cap the bottles tightly.
- Label each bottle with the date, ingredients, and batch number.
- Store in a cool, dark place.
6. Exact Recipe: Ingredients List for ~16 oz
If you want a single batch that yields approximately 16 oz (two 8 oz bottles), here is the complete ingredients breakdown:
- 99% Isopropyl Alcohol: 1¾ cups (1.75 cups)
- Organic Aloe Vera Gel: ½ cup (0.5 cups)
- Carbomer 940: 2 teaspoons
- Triethanolamine (TEA): 1 teaspoon
- Vegetable Glycerin: 2 tablespoons
- Hyaluronic Acid (powder): 1 tablespoon
- Jojoba Oil: 1 tablespoon
- Vitamin E Oil: 1 teaspoon
- Panthenate (B5): 1 teaspoon
- Allantoin: ½ teaspoon
- Lavender Essential Oil: 30 drops
- German Chamomile Essential Oil: 20 drops
- Helichrysum Essential Oil: 15 drops
- Frankincense Serrata Essential Oil: 15 drops
- Sandalwood Australian Essential Oil: 10 drops
Note: This recipe makes a silky, deeply moisturizing sanitizer with a balanced aroma that’s floral, slightly sweet, and subtly earthy.
7. Scaled Recipe for 4 × 16.9 oz Bottles
If you want to produce a larger quantity—approximately 67.6 oz total—to fill 4 × 16.9 oz bottles, multiply the original measurements by 4.225:
- 99% Isopropyl Alcohol: ~7.4 cups
- Organic Aloe Vera Gel: ~2.1 cups
- Carbomer 940: ~8½ teaspoons
- Triethanolamine (TEA): ~4.25 teaspoons
- Vegetable Glycerin: ~8½ tablespoons
- Hyaluronic Acid (powder): ~4.25 tablespoons
- Jojoba Oil: ~4.25 tablespoons
- Vitamin E Oil: ~4.25 teaspoons
- Panthenate (B5): ~4.25 teaspoons
- Allantoin: ~2.1 teaspoons
- Lavender Essential Oil: ~127 drops (~6.35 ml)
- German Chamomile Essential Oil: ~85 drops (~4.25 ml)
- Helichrysum Essential Oil: ~63 drops (~3.15 ml)
- Frankincense Serrata Essential Oil: ~63 drops (~3.15 ml)
- Sandalwood Australian Essential Oil: ~42 drops (~2.10 ml)
This larger batch is ideal if you want to stock up for your family, share with friends, or even give as thoughtful gifts.
8. Tips for Storage and Usage
- Proper Storage:
- Keep your bottles in a cool, dry place (ideally under 75°F or 24°C).
- Avoid direct sunlight, which can degrade both the alcohol and the essential oils over time.
- Avoid storing in humid bathrooms if possible, since moisture can affect the product’s shelf life.
- Usage Guidelines:
- Dispense a quarter-sized amount into your palm.
- Rub thoroughly, covering every part of your hands, including between fingers and around nails.
- Continue rubbing until the gel fully dries—this ensures the alcohol has enough contact time to effectively reduce microbes.
- Shelf Life:
- Most homemade sanitizers will last around 6 months if stored properly.
- Watch for changes in texture, smell, or color; if any occur, it may be time to discard and make a fresh batch.
- Travel-Friendly:
- Transfer your sanitizer into smaller travel-friendly containers if you’re always on the go.
- Ensure they’re properly labeled, especially if you’re flying or crossing borders where liquid volume restrictions apply.
9. Common Pitfalls and How to Avoid Them
1. Over-Thickening
- Symptom: The gel is lumpy or extremely dense, making it hard to dispense.
- Cause: Adding too much carbomer or not whisking thoroughly.
- Solution: Add a bit more 99% isopropyl alcohol and whisk until the consistency loosens.
2. Runny Consistency
- Symptom: The final product is closer to a liquid than a gel.
- Cause: Not enough carbomer or insufficient TEA.
- Solution: Sprinkle a small additional amount of carbomer, then whisk in small increments of TEA until desired thickness is reached.
3. Separation
- Symptom: Oils floating on top, watery layer at the bottom.
- Cause: Inadequate whisking or inaccurate measurements, especially with the oil phase.
- Solution: Stir or whisk again. If separation persists, double-check your oil-to-thickener ratio.
4. Irritation or Redness
- Symptom: Skin feels itchy, red, or irritated after use.
- Cause: Possible sensitivity to certain essential oils or an ingredient.
- Solution: Conduct a patch test before full use. Reduce or omit certain essential oils if sensitivity persists.
5. Loss of Efficacy
- Symptom: Sanitizer doesn’t seem to dry thoroughly or feels too gentle to be effective.
- Cause: Alcohol concentration may be too low if other liquids are added in large quantities.
- Solution: Ensure 99% isopropyl alcohol is used and that it remains at least 60% of the final solution.
10. Frequently Asked Questions
Q1: Can I substitute isopropyl alcohol with another type of alcohol?
A: It’s best to use 99% isopropyl alcohol. Substituting with lower concentrations (like 70% isopropyl) or other alcohols (like vodka) can compromise the sanitizer’s efficacy.
Q2: What if I prefer a different essential oil blend?
A: You can swap out the essential oils, but keep the total drop count consistent. For example, if you remove 20 drops of chamomile, replace them with 20 drops of an alternative oil with similar potency.
Q3: Can I skip the essential oils entirely?
A: Yes, you can. This will give you an unscented product. However, essential oils can offer additional skin benefits and aromatherapy perks.
Q4: How do I ensure my hand sanitizer meets recommended health standards?
A: The Centers for Disease Control and Prevention (CDC) recommends at least 60% alcohol content in hand sanitizers. With 99% isopropyl alcohol as your base, your final product should meet this guideline.
Q5: Is it normal for the gel to appear slightly cloudy?
A: Yes, certain ingredients like aloe vera and essential oils can create a translucent or pearly appearance. As long as you have no lumps or separation, it’s perfectly fine.
Q6: Can I use xanthan gum instead of carbomer 940?
A: Technically, you could use alternative gelling agents, but the texture and consistency may differ. Carbomer 940 is specifically designed for clear gels and offers a silky, professional texture.
Q7: Do I need to add a preservative?
A: The high alcohol content inherently acts as a preservative. Additional preservatives are generally not required for a predominantly alcohol-based product. However, if you alter the formula significantly, consider a broad-spectrum preservative.
11. Conclusion
Crafting your own DIY Luxury Deep Nourishing Gel Hand Sanitizer is both a rewarding and practical endeavor. Not only do you gain control over the quality and scent of each batch, but you also ensure that the finished product remains gentle yet effective. By following the steps outlined—from workspace preparation and safety measures to the precise incorporation of nourishing agents and essential oils—you’ll achieve a professional-grade sanitizer that hydrates, softens, and protects your skin.
Remember, attention to detail and accuracy in measurement are your best allies. With proper storage and mindful usage, each batch can last up to six months, giving you plenty of time to enjoy the luxurious, spa-like feel every time you sanitize your hands. Whether you’re scaling up the recipe to share with loved ones or keeping it simple for personal use, you’ll appreciate the soothing, non-drying finish and the wonderful aroma that sets your homemade sanitizer apart.
Now that you have this comprehensive guide, you’re ready to take your DIY skincare game to the next level. Enjoy the confidence of knowing exactly what goes into your hand sanitizer and delight in a formula that pampers your skin as much as it protects it.
By following these guidelines and steps, you’re well on your way to creating a deeply moisturizing hand sanitizer that offers both peace of mind and a luxurious experience. Here’s to healthy, hydrated hands for you and your loved ones!


